


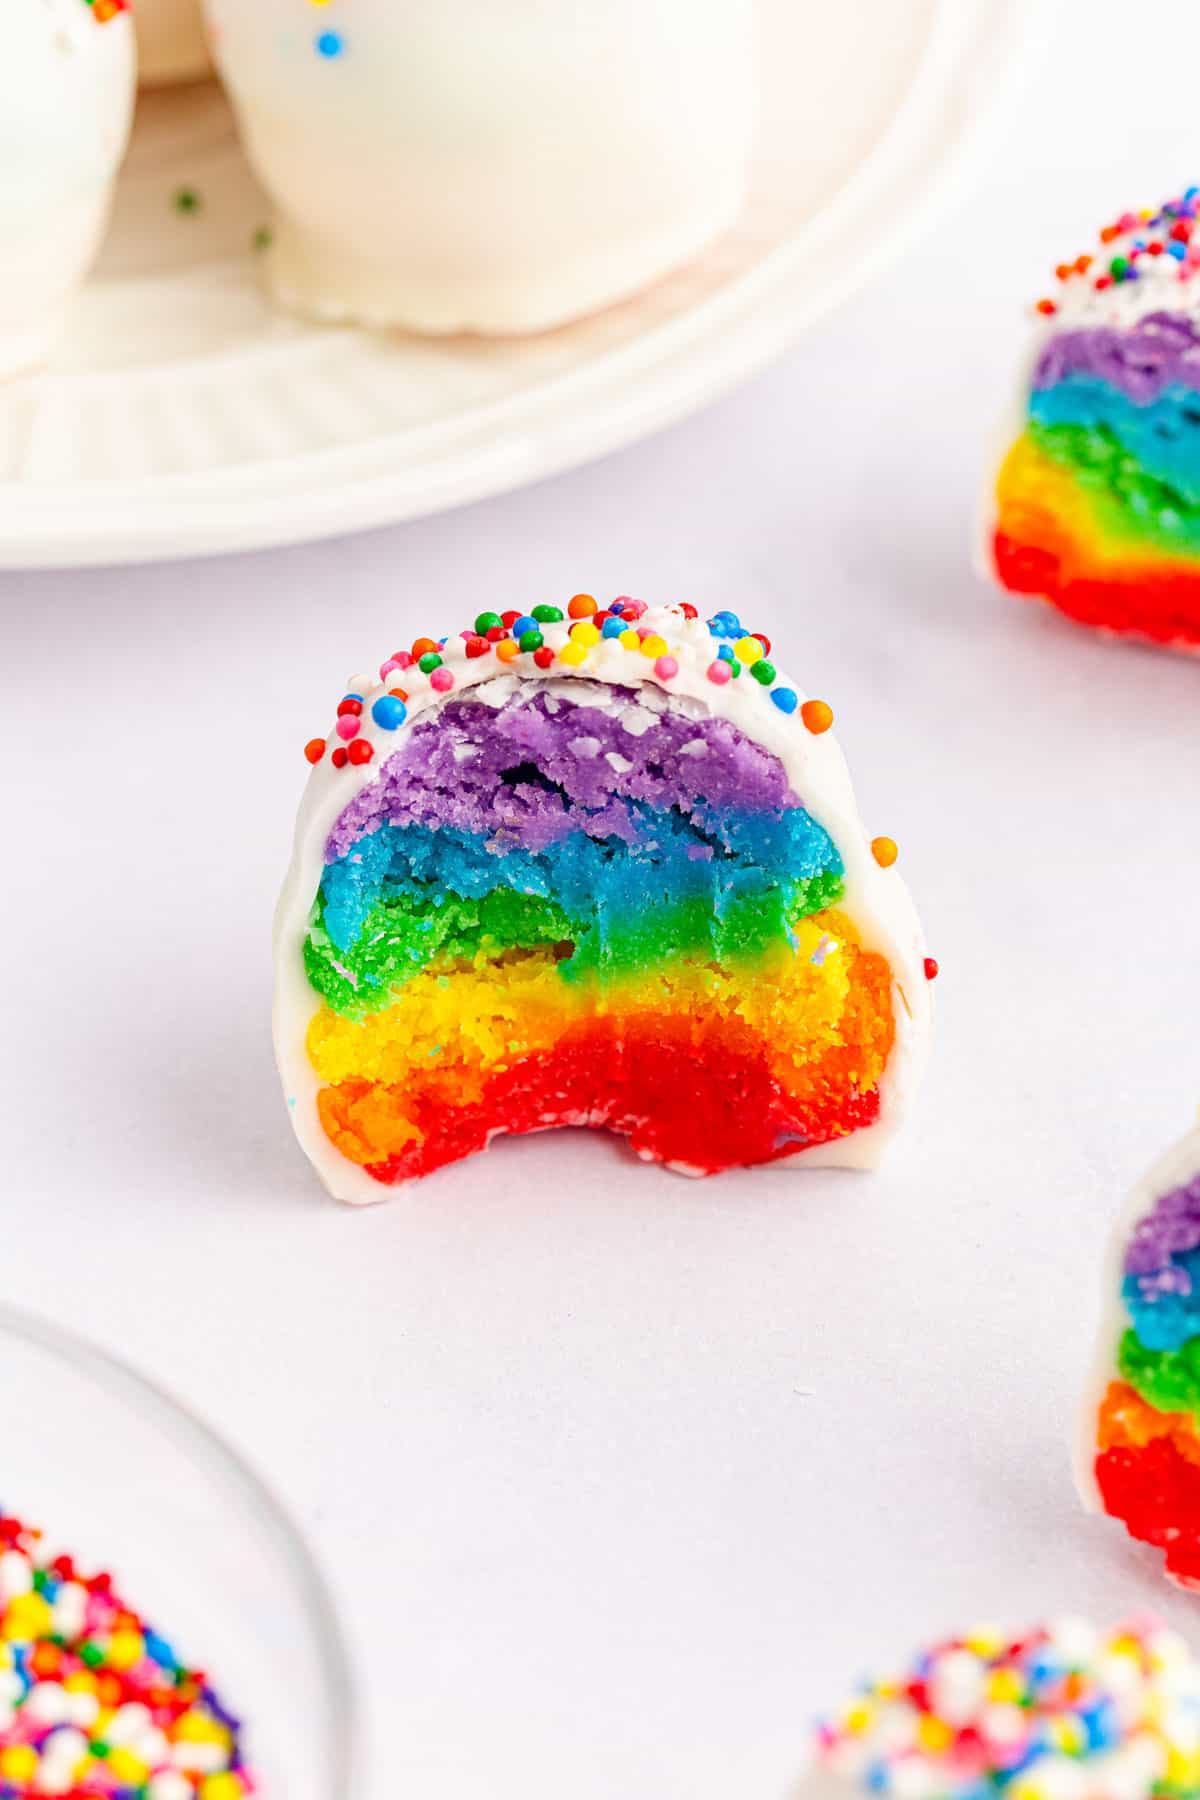
No bake rainbow cake balls are like a bite-sized party for your taste buds! These eye-catching treats are the perfect way to surprise and delight both kids and adults alike. Filled with vibrant layers of cake mix dough and topped with sprinkles, these little morsels of fun are both delicious and beautiful. They're sure to grab people's attention and will be an instant hit at your next party or get-together.

This post contains affiliate links, which means that I may make a commission on purchases and/or clicks (at no extra cost to you). Please read our full disclosure here.
If you're looking for a delicious, eye-catching treat that is super easy to make, look no further than these no bake rainbow cake balls! This sweet bite only requires five simple ingredients: cream cheese, white cake mix, vanilla melting wafers, gel food coloring, and sprinkles.
Not only do these colorful treats taste amazing, but they also don't require an oven to create them. All you need to do is mix the heat-treated cake mix with cream cheese and food coloring and then shape the dough into balls.
Finish by dipping each ball in melted vanilla wafers and topping with rainbow sprinkles - and voila, you have a delightful little snack that looks like it took much more time and effort to make!
Jump to:
- What Are Cake Balls?
- Why You’ll Love This Recipe
- What You’ll Need To Make Rainbow Cake Balls
- Step-By-Step Instructions
- Want To Make As Cake Pops Instead?
- Tips & Tricks For Making The Best Rainbow Cake Balls
- Serving Suggestions And Substitutions
- How To Store Leftovers
- Frequently Asked Questions
- Tools And Equipment For This Recipe
- 📖 Recipe
What Are Cake Balls?
Cake balls, also known as cake pops or truffles, are small round treats that are usually made of crumbled pre-cooked cake that's been mixed with icing or frosting and then rolled into balls.
They are usually dipped in melted chocolate or other coatings and can be decorated with various toppings such as chopped nuts, sprinkles, candy pieces, etc.
This quick and easy no-bake recipe is a delicious twist on the classic cake ball. It uses a combination of cream cheese and heat-treated cake mix to make the dough instead of needing pre-baked cake.
This recipe is for rainbow cake balls, but you can easily turn these cake balls into rainbow cake pops if you prefer. Keep reading below for instructions to convert your cake balls into cake pops.
Why You’ll Love This Recipe
Have the perfect party-ready dessert with minimal effort and maximum reward! These no-bake rainbow cake balls made from white cake mix and cream cheese are sure to be a hit at any party and take no time to make. Not only are they delicious, but also eye-catching! I think you'll love this recipe and here are a few reasons why:
- They are easy to make, with just five simple ingredients
- No oven required - all you need is a microwave or double boiler!
- They are perfect for parties - with a vibrant array of colors, these cake balls stand out in any crowd.
Enjoy making these easy and yummy treats today!
What You’ll Need To Make Rainbow Cake Balls

Cake mix: You'll need a box of cake mix for this recipe. I like to use Betty Crocker white cake mix but any brand will work.
Cream cheese: The cream cheese is an important part of this no-bake recipe as it combines with the cake mix to make the dough. I recommend using full-fat cream cheese for the best results.
Flavor extract (optional): If desired, you can add a few drops of your favorite flavor extract to the dough to make it taste even better. I like almond or vanilla extract but feel free to experiment.
Gel food coloring: This is what adds the vibrant colors of the rainbow to your cake balls. I recommend using gel food coloring because it produces a richer and deeper color than traditional liquid food coloring without adding too much extra moisture to the dough. To replicate the colors in these cake balls, you will need red, orange, yellow, green, blue, and purple gel food coloring.
Melting wafers: Melting wafers are a great alternative to traditional chocolate and will give the cake balls a beautiful, glossy finish. I like to use Ghirardelli melting wafers for this recipe as they yield consistent results and are easy to use.
Sprinkles (optional): Finally, you can decorate the cake balls with sprinkles, if desired!
Step-By-Step Instructions
Once you have all your ingredients, making these cake balls is a breeze. Follow these easy steps and you'll have beautiful rainbow cake balls in no time:
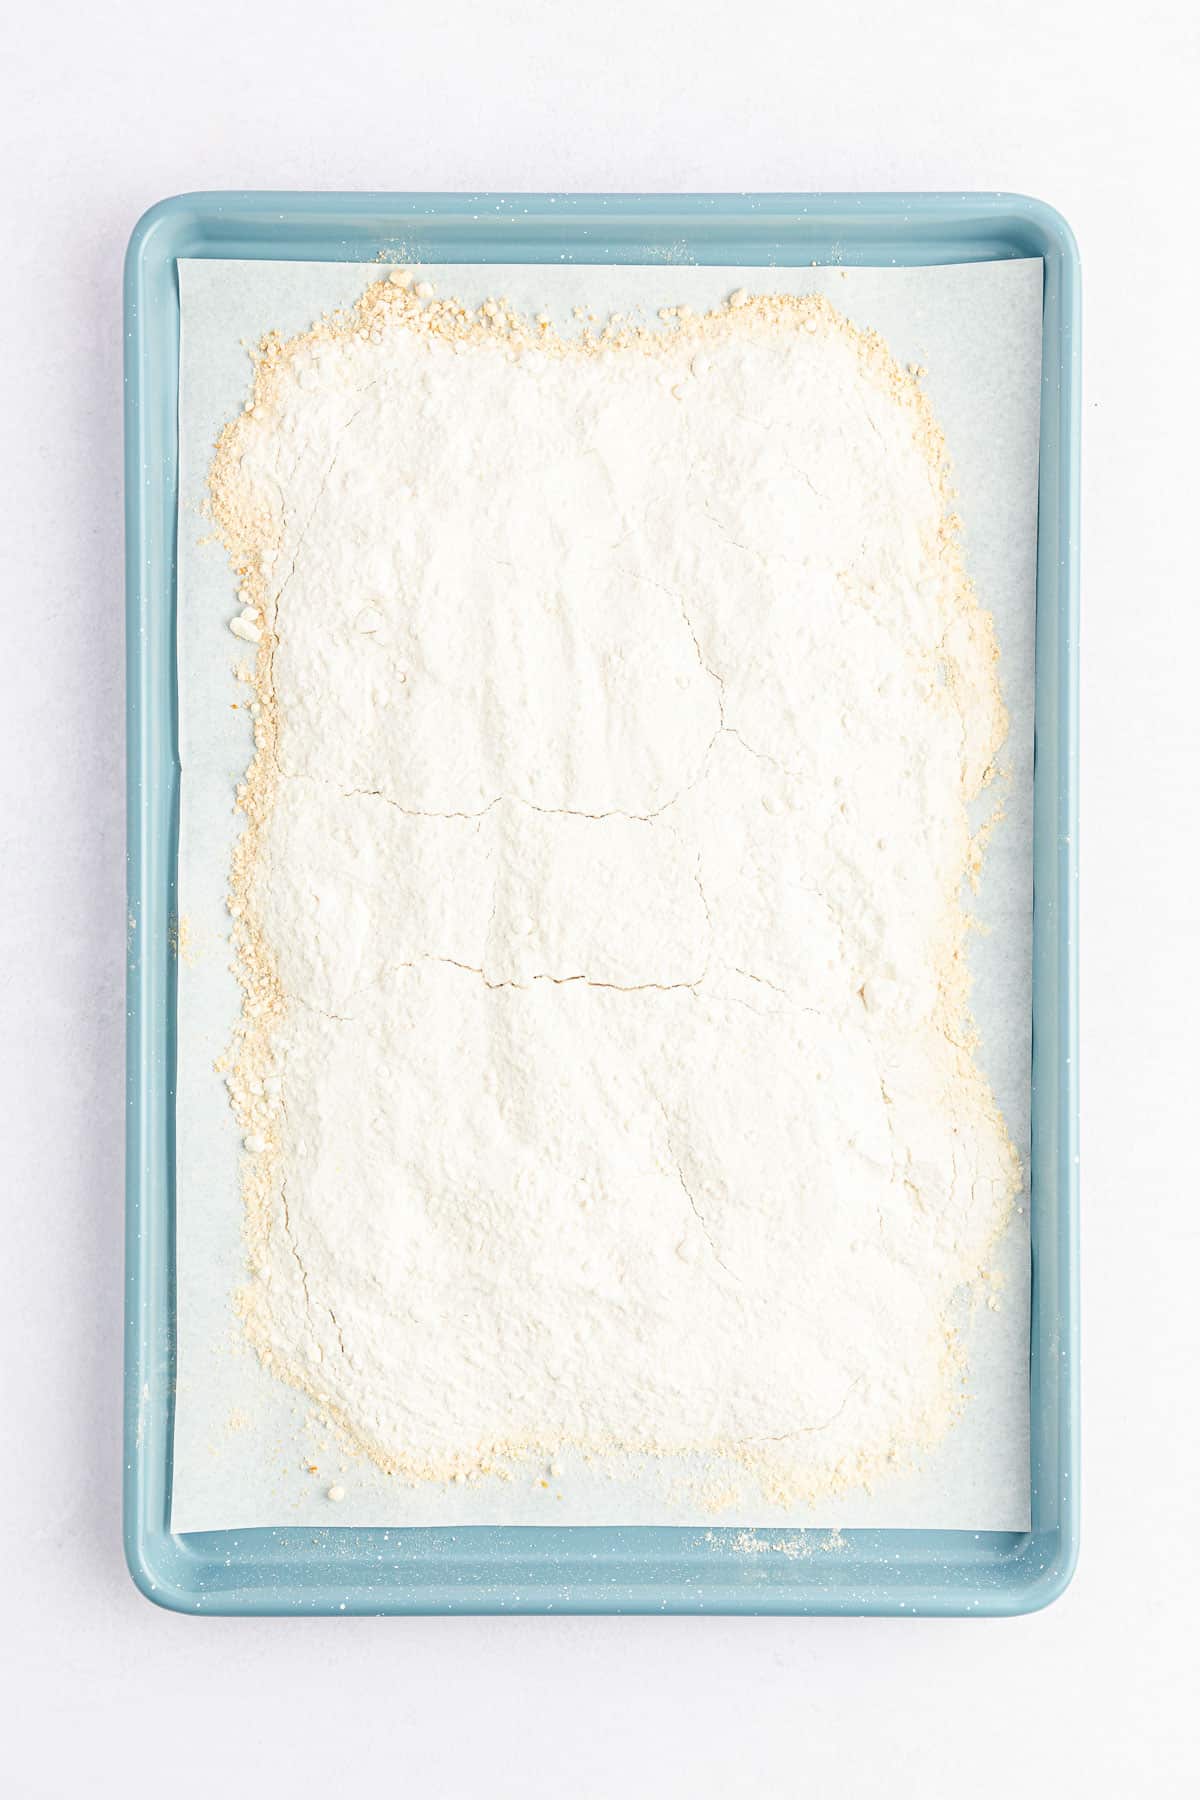
Step 1: You will need to heat treat the cake mix before you begin to kill any bacteria. To do this, preheat the oven to 350 degrees Fahrenheit (177 degrees Celsius), line a baking sheet with parchment paper, spread the cake mix onto the parchment paper, and bake for 5-10 minutes. Set aside to cool completely.
Step 2: In a medium bowl, beat the cream cheese and flavor extract (if using) with a hand mixer until smooth and creamy.

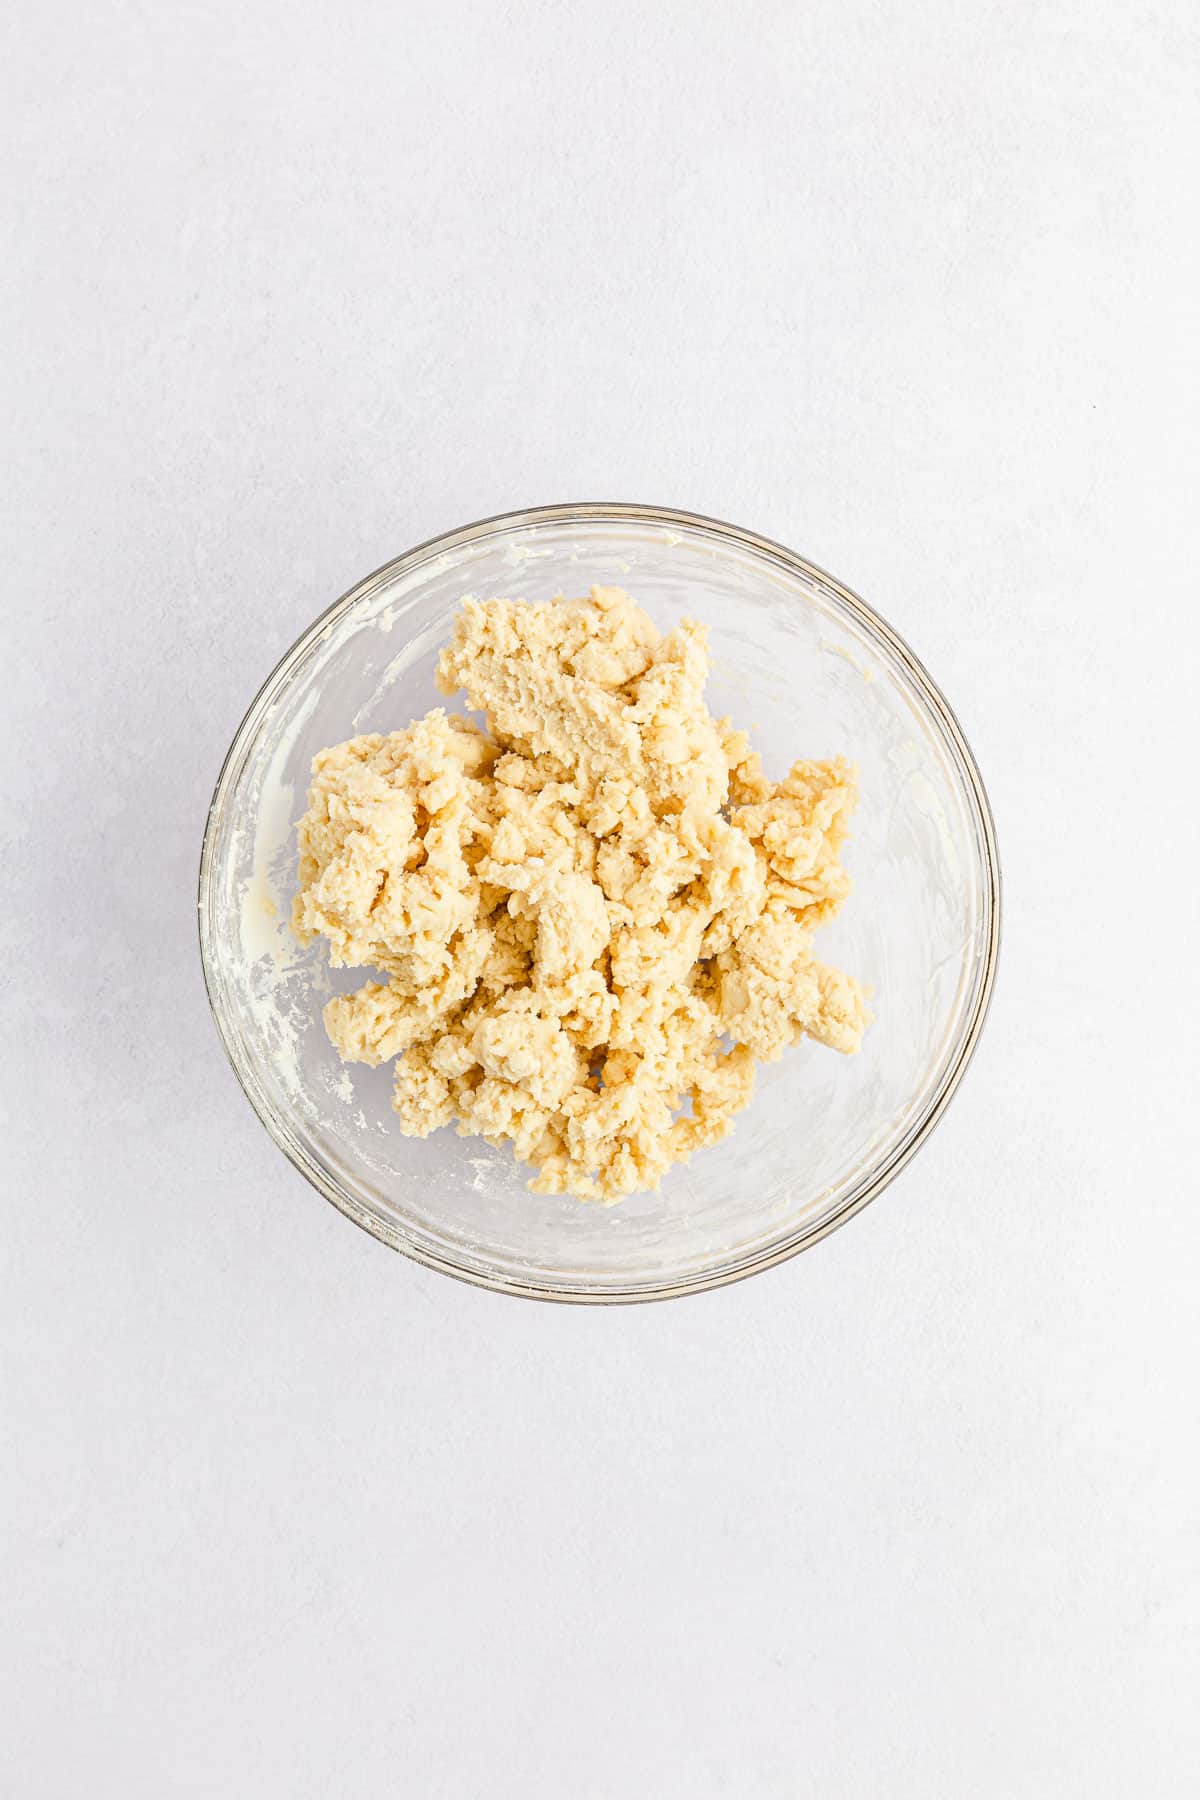
Step 3: Add the cooled cake mix to the cream cheese and mix until everything is well blended and you reach a firm dough consistency.

Step 4: Divide the dough into six even portions and place each portion into separate small bowls.
Step 5: Add a few drops of red food coloring to the dough in one of the small bowls and mix until well incorporated. Repeat the process for the remaining five colors. You should have red, orange, yellow, green, blue, and purple dough once you are finished.


Step 6: Cover each small bowl with plastic wrap and chill in the refrigerator for at least 1 hour.
Step 7: Line a baking sheet with parchment paper. Once the dough has chilled, remove the first color, red, and pull apart small 1-inch-sized pieces and lightly flatten them out with your fingers. Place them on the lined baking sheet 1-2 inches apart. Do this until you have used up all of the red dough.
Step 8: Remove the next colored dough from the refrigerator, orange, and pull apart small 1-inch-sized pieces, lightly flatten it out, and stack it on top of the red pieces. Do this until you have used up all of the orange dough.


Step 9: Repeat this process with the remaining colors, one color at a time.
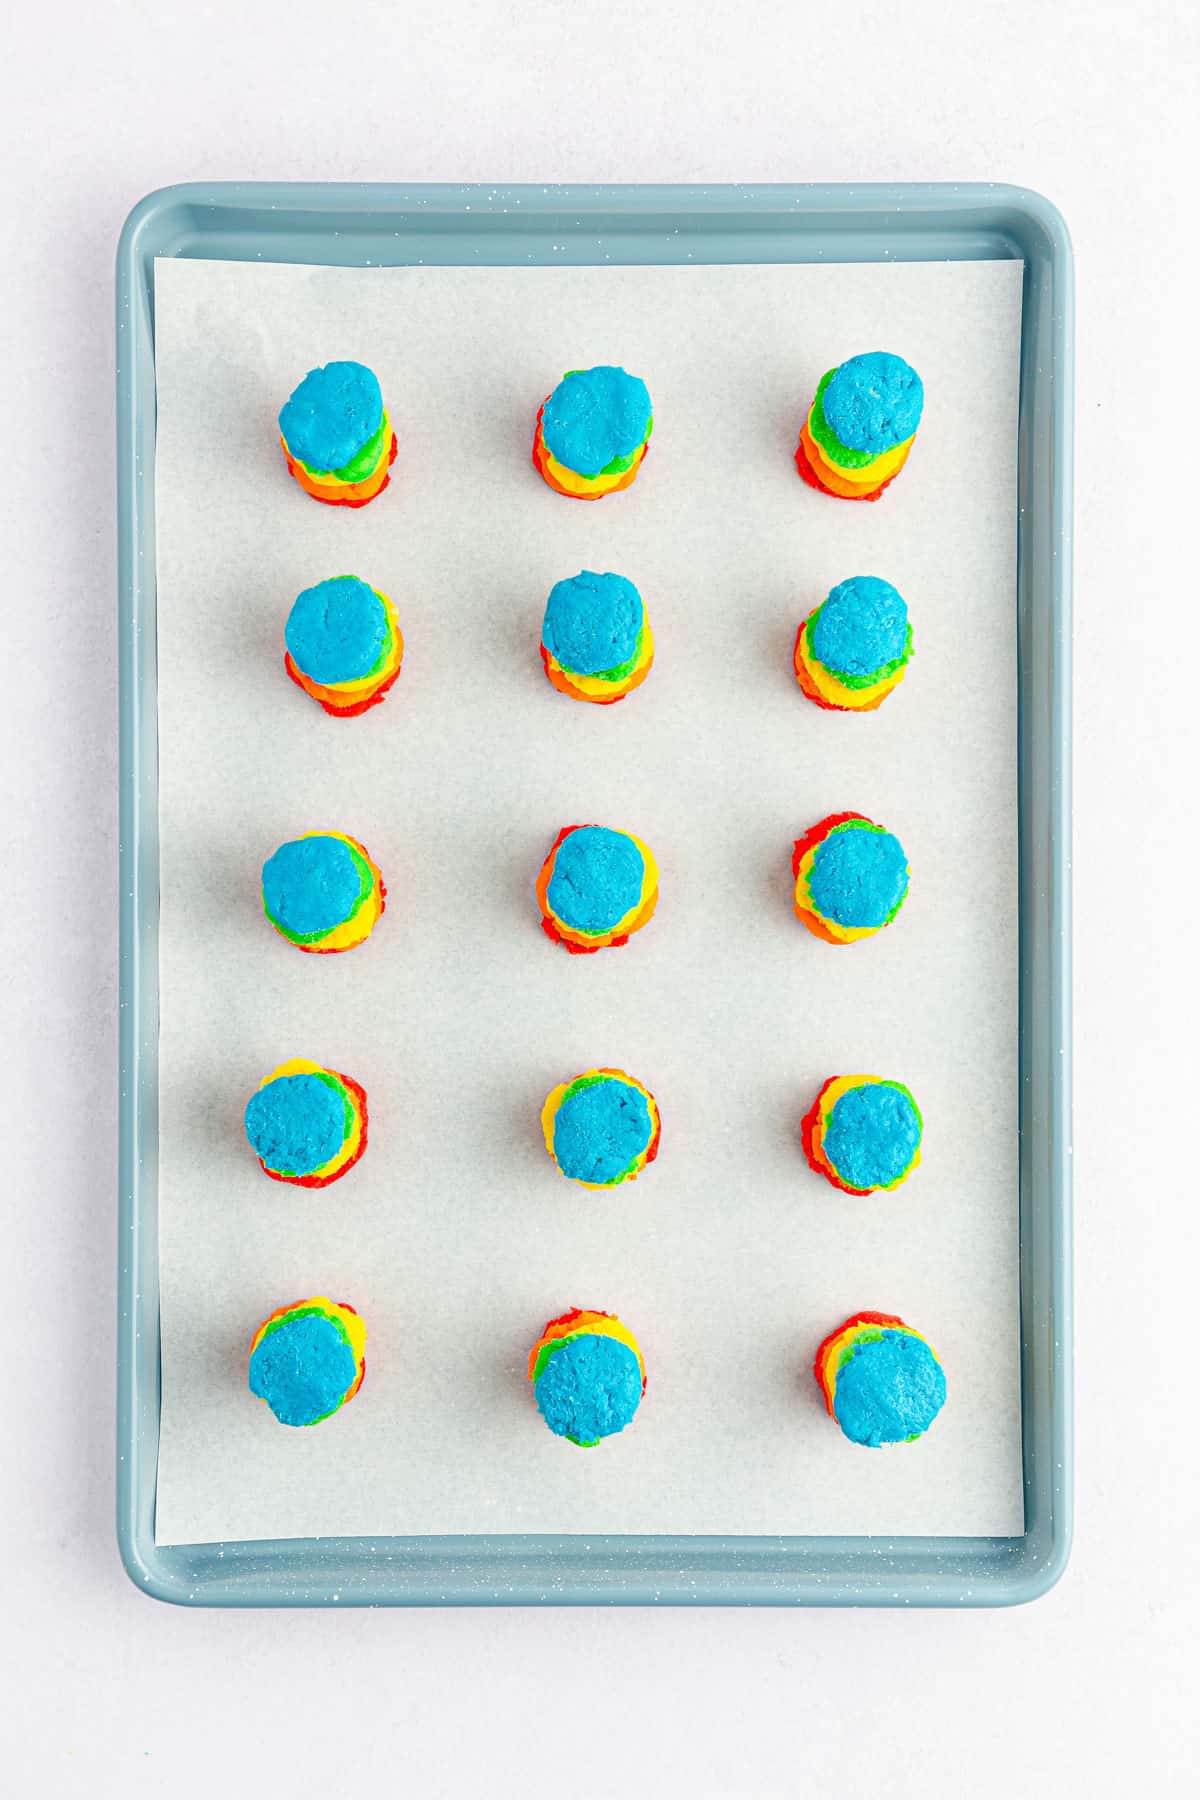

Step 10: Once you have stacked all of the colors, use your hands to roll each ball of stacked dough into a smooth ball, then place it back onto the baking sheet.
Step 11: Once all of the balls have been rolled, return them to the refrigerator to chill for another 1 hour. Chilling the dough balls will help the layers stick together while dipping in the next step.
Step 12: Prepare a second baking sheet with parchment paper and set aside. After the balls have chilled, melt the melting wafers in the microwave or using a double boiler.


Step 13: Remove the dough balls from the refrigerator and place one ball onto a fork. Dip it completely into the melted wafers, then lift the fork up and tap it on the side of the double boiler or bowl to remove any excess coating. Place it onto the new lined baking sheet and immediately add sprinkles on top. Repeat with the remaining balls.


Step 14: Allow the rainbow balls to set completely for about 5-10 minutes before serving. You can place them in the refrigerator to speed up the process. Keep the balls refrigerated until ready to serve.
Want To Make As Cake Pops Instead?
If you want to take your cake balls one step further, you can turn them into cute little rainbow cake pops! All you need is some lollipop sticks and the instructions are almost exactly the same as above.
Instead of using a fork to dip your cake balls, simply dip the end of a lollypop stick in the melted wafers and insert it into the side of the chilled cake ball.
Once the stick is firmly in place, dip the entire cake pop into the melted wafers and then set it on a parchment paper-lined baking sheet.
Decorate the cake pops with sprinkles, if desired, and allow to set completely before serving.

Tips & Tricks For Making The Best Rainbow Cake Balls
If you want to create the most amazing rainbow cake balls, follow these simple tips! Making cake balls is a fun and easy process but with my top tricks, they will be scrumptious every single time. Here are some of my go-to methods for making perfect rainbow cake balls:
- Be sure to heat treat the cake mix before preparing your cake ball dough. This will ensure that any potential bacteria present in the mix is killed and the balls are safe to eat raw.
- If you don't want to heat treat the cake mix in the oven, you can do this in the microwave. Use a microwave-safe bowl and heat the cake mix for three minutes, stirring every 30 seconds to prevent hot spots.
- Chill the dough before layering the colors and again before rolling it into balls. This will make it easier to work with and produce a more consistent texture for your cake balls.
- I prefer to use high-quality melting wafers like Ghirardelli vanilla or dark chocolate to coat the balls and Wilton candy melts just for decorating. I find that the Wilton candy melts tend to clump faster than the Ghirardelli wafers so you'll get a smoother coating with the Ghirardelli wafers.
- When melting your wafers, you can heat it using a double boiler on a low heat, stirring often, until fully melted and smooth. Or you can place the melts in a microwave-safe bowl and melt them in the microwave on a low or defrost setting in 30-second increments, stirring between each interval, until fully melted and smooth. Make sure to melt it on a low setting and stir often otherwise the coating may seize and thicken.

Serving Suggestions And Substitutions
Rainbow cake balls are an excellent snack or dessert idea and they will be a hit with everyone! They are perfect for parties, potlucks, or just as a special treat. Here are some delicious ways to enjoy them:
- Serve the rainbow cake balls as-is for an easy snack.
- Top them with a dollop of whipped cream for a decadent dessert.
- Serve the cake balls on top of ice cream or a scoop of yogurt.
When it comes to substitutions, there are a few easy ones you can make. You can use any type of coating you like, from white chocolate to dark chocolate. If you don't have melting wafers, you can also use regular chocolate chips.
You can also change up the sprinkles to match any theme or occasion you have in mind. From metallic sprinkles to seasonal favorites, there are plenty of options when it comes to topping your delicious rainbow cake balls!

How To Store Leftovers
If you have any leftover rainbow cake balls, store them in an airtight container and keep them refrigerated for up to 1 week.
I recommend keeping your cake balls refrigerated until you're ready to serve them. If they remain at room temperature for too long, the dough may start to expand and cause the coating to crack.
You can also freeze the cake balls for up to 3 months. When ready to serve, allow them to thaw in the refrigerator overnight.
Frequently Asked Questions
Yes, you can easily turn these into cake pops by inserting a lollipop stick into each ball before dipping them in the coating.
Yes, it is important to heat treat the cake mix before making the dough. This will kill any bacteria that may be present in the cake mix and make it safe to eat raw. You can do this in the oven or microwave, depending on your preference.
Yes, you can a different flavor of boxed cake mix if you prefer. Just make sure that it is white or light in color as darker cake mixes (such as spice cake or chocolate) will make the rainbow colors less vibrant or hard to see.
Yes, you can use any type of melting wafers or chocolate chips to coat the balls. White chocolate, dark chocolate, or even colored candy melts would work great!

Tools And Equipment For This Recipe
Glass Mixing Bowls: These glass mixing bowls are super versatile. You can use them for mixing, storing, and serving.
KitchenAid Hand Mixer: This hand mixer is my go-to for mixing everything from cake mix to cheese balls. It's powerful, easy to use, and easy to clean.
Baking Tray: This non-stick baking tray is perfect for laying out your dipped cake balls to set. It's also great for making cookies or other baked goods.
📖 Recipe

No Bake Rainbow Cake Balls
Ingredients
- 15.25 ounce box white cake mix
- 8 ounces cream cheese softened
- gel food coloring in red, orange, yellow, green, blue, and purple
- 20 ounces Ghirardelli white vanilla melting wafers
- sprinkles to decorate
Instructions
- You will need to heat treat the cake mix before you begin to kill any bacteria. To do this, preheat the oven to 350 degrees Fahrenheit (177 degrees Celsius), line a baking sheet with parchment paper, spread the cake mix onto the parchment paper, and bake for 5-10 minutes. Set aside to cool completely.
- In a medium bowl, beat the cream cheese and flavor extract (if using) with a hand mixer until smooth and creamy.
- Add the cooled cake mix to the cream cheese and mix until everything is well blended and you reach a firm dough consistency.
- Divide the dough into six even portions and place each portion into separate small bowls.
- Add a few drops of red food coloring to the dough in one of the small bowls and mix until well incorporated. Repeat the process for the remaining five colors. You should have red, orange, yellow, green, blue, and purple dough once you are finished.
- Cover each small bowl with plastic wrap and chill in the refrigerator for at least 1 hour.
- Line a baking sheet with parchment paper. Once the dough has chilled, remove the first color, red, and pull apart small 1-inch-sized pieces and lightly flatten them out with your fingers. Place them on the lined baking sheet 1-2 inches apart. Do this until you have used up all of the red dough.
- Remove the next colored dough from the refrigerator, orange, and pull apart small 1-inch-sized pieces, lightly flatten it out, and stack it on top of the red pieces. Do this until you have used up all of the orange dough.
- Repeat this process with the remaining colors, one color at a time.
- Once you have stacked all of the colors, use your hands to roll each ball of stacked dough into a smooth ball, then place it back onto the baking sheet.
- Once all of the balls have been rolled, return them to the refrigerator to chill for another 1 hour. Chilling the dough balls will help the layers stick together while dipping in the next step.
- Prepare a second baking sheet with parchment paper and set aside. After the balls have chilled, melt the melting wafers in the microwave or using a double boiler.
- Remove the dough balls from the refrigerator and place one ball onto a fork. Dip it completely into the melted wafers, then lift the fork up and tap it on the side of the double boiler or bowl to remove any excess coating. Place it onto the new lined baking sheet and immediately add sprinkles on top. Repeat with the remaining balls.
- Allow the rainbow balls to set completely for about 5-10 minutes before serving. You can place them in the refrigerator to speed up the process. Keep the balls refrigerated until ready to serve.
Nutrition
* Nutritional information is based on third-party calculations and should be considered estimates. Actual nutritional content may vary based on brands of ingredients used, measuring methods, portion sizes, and more.


Leave a Reply