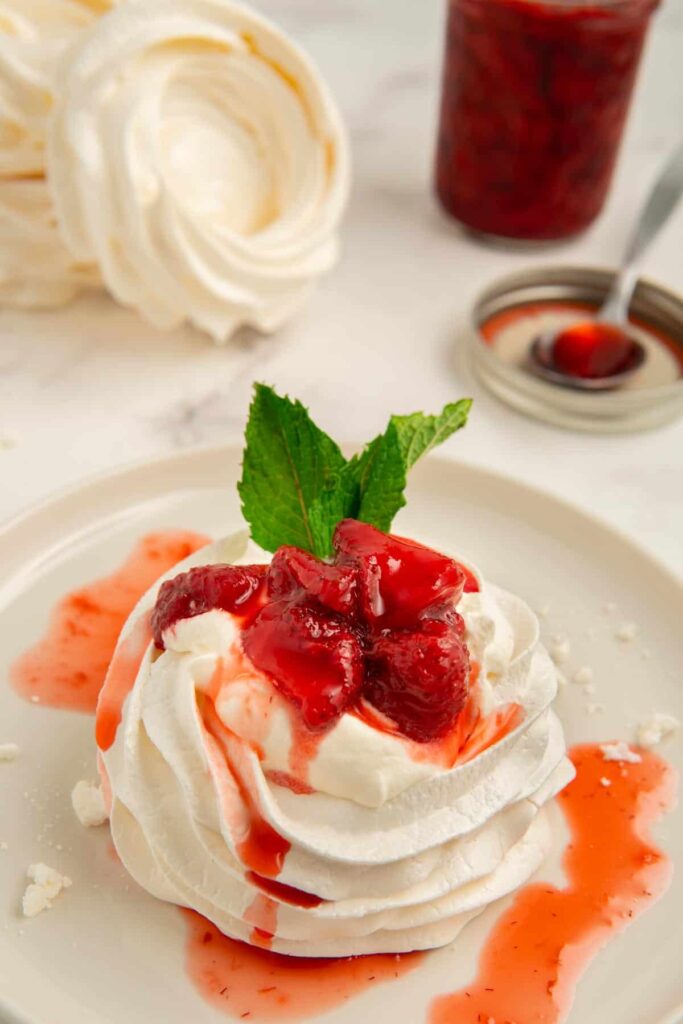
These mini pavlova nests are the perfect individual serving dessert! The crispy meringue exterior gives way to a soft, sweet center, and they're topped with creamy whipped cream and fresh strawberry compote. They're so pretty to look at and even better to eat! Whether you're hosting a party or just looking for a special treat, these mini pavlovas will definitely hit the spot.

This post contains affiliate links, which means that I may make a commission on purchases and/or clicks (at no extra cost to you). Please read our full disclosure here.
Looking for a delightful dessert that is sure to impress? Look no further than mini pavlova nests with whipped cream and strawberry compote. These bite-sized treats are perfect for any special occasion, and they are surprisingly easy to make.
The key to success is in the preparation; be sure to whip the egg whites to stiff peaks and use a piping bag to create perfectly-shaped nests.
Once they are baked to crispy perfection, simply fill them with sweetened cream and fresh strawberry compote. Your guests will be amazed at how something so small can pack such a big flavor punch!
Why You’ll Love This Recipe
These mini pavlova nests are the perfect summer dessert. They are light and airy, with a delicate crunch from the meringue and a creamy sweetness from the whipped cream and strawberry compote. Best of all, they are easy to make and can be assembled in advance. Here are four reasons why you will love this recipe:
- The meringue is light and crisp, with a delicate sweetness that pairs perfectly with the rich cream and tart strawberry compote.
- The whipped cream is pillowy soft and provides a lovely contrast to the crunchy meringue.
- The strawberry compote is fresh and tart, with a beautiful ruby hue.
- Assembling the pavlovas in advance means that you can enjoy them without having to spend time in the kitchen when your guests arrive.
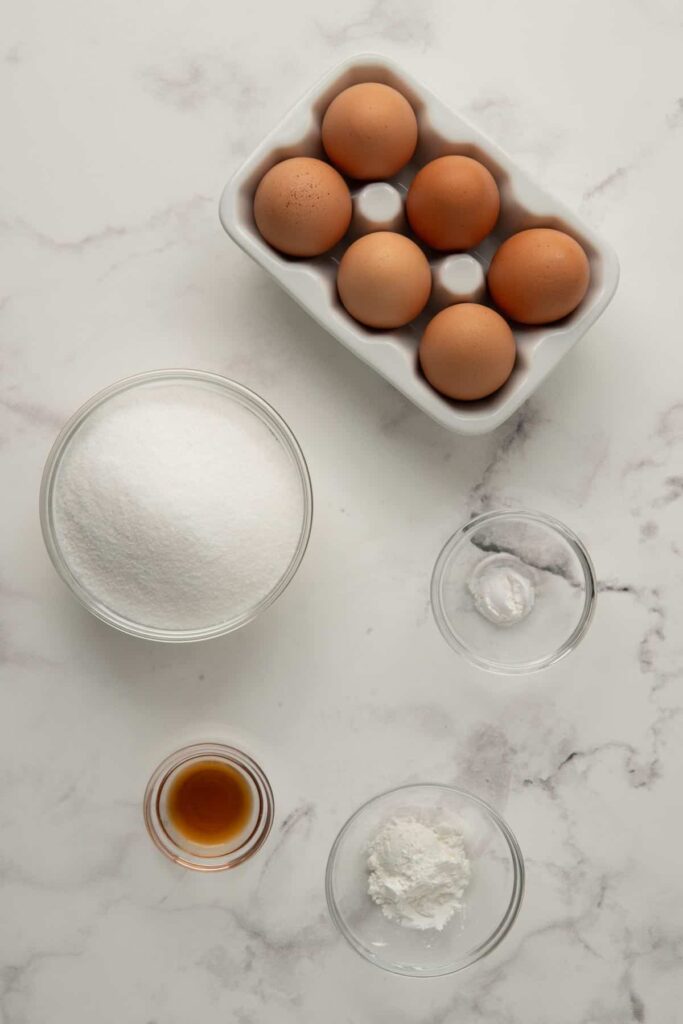
What You’ll Need To Make Mini Pavlova Nests With Whipped Cream And Strawberry Compote

Mini Pavlova Nests
Egg whites: Be sure to use fresh egg whites for this recipe. Room-temperature egg whites will whip up to stiff peaks more easily than cold ones, so let them sit out on the counter for 30 minutes before beginning.
Sugar: I like to use superfine sugar in this recipe, but you could also use regular granulated sugar if you have it on hand. The superfine sugar will dissolve more easily into the egg whites, resulting in a smoother meringue.
Cream of tartar: This ingredient helps to stabilize the egg whites and prevents them from deflating.
Corn starch: This helps to absorb moisture and keep the meringues crisp.
Vanilla extract: This adds a lovely depth of flavor to the pavlovas. You can use vanilla extract or vanilla paste for this recipe.
Whipped Cream
Heavy whipping cream: Be sure to use heavy whipping cream, also known as double cream, for this recipe. Do not use light cream or half-and-half, as they will not whip up properly.
Powdered sugar: This sweetens the whipped cream and helps to stabilize it.
Vanilla extract: This gives the whipped cream its signature sweet vanilla flavor.
Strawberry Compote
I recommend using my simple strawberry compote recipe to top these delicious mini pavlova nests, but you can use fresh strawberries or other fruit if you prefer. To make the strawberry compote, you'll need fresh strawberries, sugar, lemon, and vanilla extract.
Step-By-Step Instructions
Mini Pavlova Nests
Making these delicious pavlova nests is easy. Here's a step-by-step guide to show you how it's done.
Step 1: Preheat the oven to 230 degrees Fahrenheit and line two baking sheets with parchment paper.
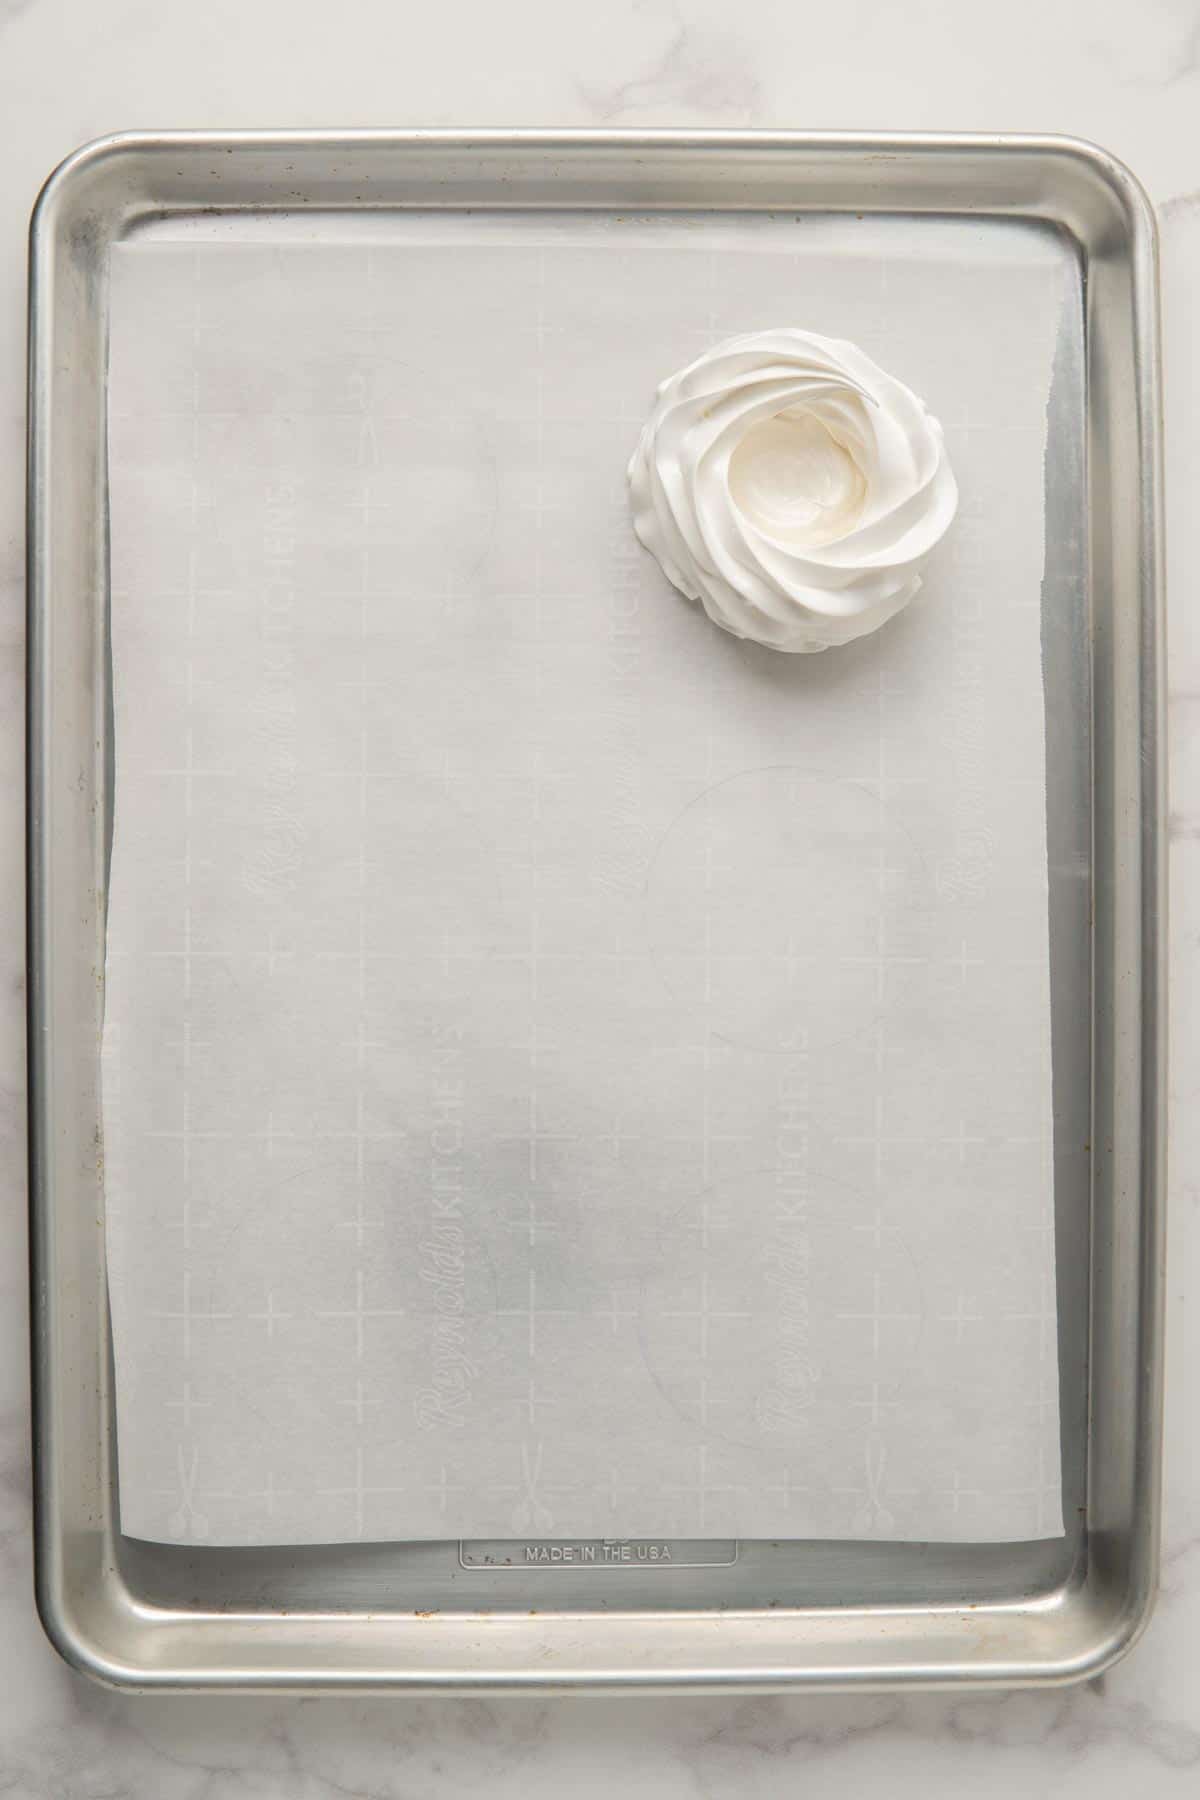
Step 2 (Optional): Use a drinking glass or biscuit cutter to trace 12 circles onto the parchment paper. This will help you to pipe perfect circles of meringue, but it is not essential.
Step 3: Wipe out your mixing bowl with vinegar then add the egg whites to the bowl. You can use a stand mixer or handheld mixer for this recipe.


Step 4: Start whipping the egg whites on medium-low speed until foamy, then add the cream of tartar.
Step 5: Increase the speed to medium-high and continue whipping until the egg whites reach soft peaks.


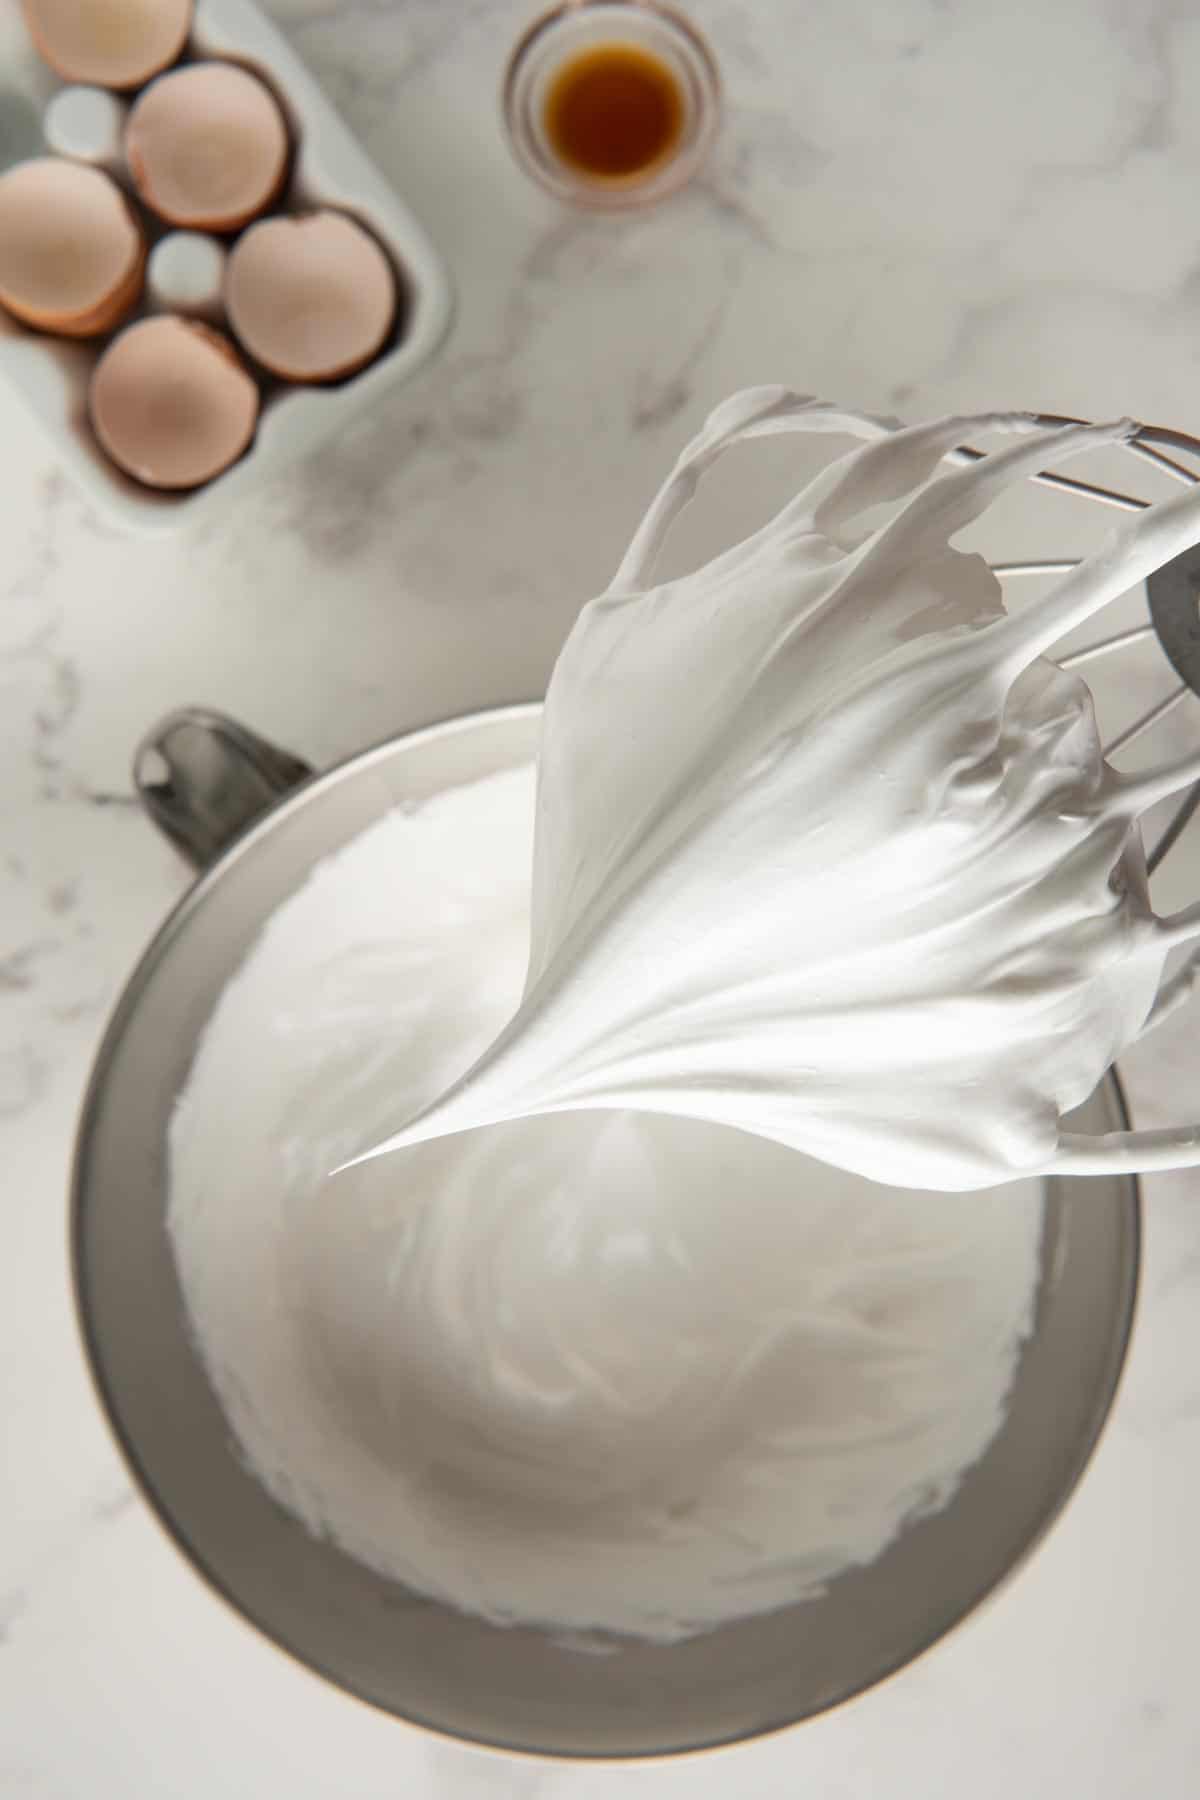
Step 6: Add the sugar gradually and continue mixing until the egg whites reach stiff peaks.
Step 7: Add the vanilla and cornstarch and mix until fully incorporated.


Step 8: Transfer the meringue to a piping bag fitted with a star tip and pipe 12 nests onto the prepared baking sheets. If you are using the circles as a guide, be sure to pipe the meringue inside of them. Pipe the base first and then swirl around the outside 2-3 times to make the sides of the nests.
Step 9: Bake the pavlovas for 1½ to 2 hours, or until they are crisp and dry to the touch. Meringues that are properly cooked should lift easily from the parchment so you can test them by gently lifting the edge of one of the nests. If it doesn't release easily, give it a few more minutes and check again.


Step 10: Turn off the oven and prop the door open with a wooden spoon. Allow the pavlovas to cool in the oven for 1 hour to prevent them from cracking.
Step 11: Once cooled, top the pavlovas with whipped cream and strawberry compote (or your desired topping) just before serving. Enjoy!
Whipped Cream
Step 1: Add the heavy cream, powdered sugar, and vanilla to a large bowl.
Step 2: Use a handheld mixer or stand mixer to whip the cream on medium-high speed until stiff peaks form.
Step 3: Serve immediately or store in the fridge for up to 2 hours.
Recipe Tips And Tricks
Here are a few tips and tricks to help you make the perfect mini pavlova nests:
- The meringue for these pavlovas should be stiff and glossy. If it is not, keep mixing. It can take up to 10-15 minutes to reach the stiff peak stage. You can tell if your meringue has reached stiff peaks by turning the bowl upside down. If the meringue holds its shape and does not fall out, it is ready.
- Be sure to use room-temperature eggs for this recipe. Cold eggs will not whip up as well and will result in a less stable meringue.
- Adding cream of tartar to the egg whites helps to stabilize the eggs and will result in a fluffier meringue.
- Don't skip the cornstarch! It is what gives these pavlovas their characteristic crisp texture and stops them from going soggy.
- The baking time for these pavlovas will vary depending on the size and shape of your nests. Start checking them after 1½ hours and bake for a few minutes longer if necessary.
- If you plan on letting your prepared pavlovas sit for a while, like at a party, I recommend using a recipe for Stabilized Whipped Cream to ensure that your whipped cream holds its shape.

Serving Suggestions And Substitutions
There are lots of different ways that you can serve these mini pavlova nests. I love keeping is simple with whipped cream and strawberry compote, but here are a few more ideas:
- Top the pavlovas with whipped cream and your favorite fruit.
- Try a savory topping like salmon caviar or goat cheese.
- For a chocolate twist, top the pavlovas with whipped cream and chocolate sauce or chop up your favorite candy bar and sprinkle this on top of the whipped cream.
- You can also use different flavored extracts in place of the vanilla extract. Try almond, lemon, or peppermint extract.
How To Store Leftovers
Leftover pavlovas can be stored in an airtight container at room temperature for up to 2-3 days. The meringue will start to soften after the first day, but they will still be delicious.
You can also freeze these pavlovas for up to 2 months. Wrap them tightly in plastic wrap or place them in a freezer-safe bag. When you are ready to eat them, remove them from the freezer and top with your desired toppings just before serving - no need to defrost the nests first.

Frequently Asked Questions
Q: Can I make mini pavlova nests ahead of time?
A: Yes! You can make the meringue nests up to 2 days in advance. Store them in an airtight container at room temperature until you are ready to use them.
Q: What can I use instead of strawberry compote?
A: You can use any fruit compote or jam that you like. Raspberry, blueberry, or peach compote would be delicious. You can also use fresh fruit if you prefer.
Q: Can I use a different size piping tip?
A: Yes, you can use a different size piping tip if you like. Just keep in mind that the size of your nests will change if you do this. I used a Wilton 1M piping tip to create the mini pavlova nests pictured.
Q: Can I make these pavlovas gluten-free?
A: Yes! Just be sure to use a gluten-free cornstarch.

Tools And Equipment For This Recipe
Wilton 1M Piping Tip: This piping tip is perfect for piping these mini pavlova nests. It has a large star-shaped opening that creates beautiful swirls on the nests.
Riccle Disposable Piping Bags 12 Inch: You’ll need a piping bag to pipe the meringue into nest shapes. I like to use disposable piping bags for easy clean-up, but you can also use a reusable bag.
Nordic Ware Commercial Baker’s Half Sheet: This half-sheet pan is the perfect size for 6-8 mini pavlova nests (depending on how large you make them). It’s also great for baking cookies, cakes, and other desserts.
📖 Recipe

Mini Pavlova Nests
Ingredients
Mini Pavlova Nests
- 6 large egg whites
- ½ teaspoon cream of tartar
- 1½ cups caster sugar
- 2 teaspoon cornstarch
- 2 teaspoon vanilla extract
Whipped Cream
- 1½ cups heavy whipping cream
- ½ cup powdered sugar
- ½ tablespoon vanilla extract
Instructions
Mini Pavlova Nests
- Preheat the oven to 230 degrees Fahrenheit and line two baking sheets with parchment paper.
- Use a drinking glass or biscuit cutter to trace 12 circles onto the parchment paper. This will help you to pipe perfect circles of meringue, but it is not essential.
- Wipe out your mixing bowl with vinegar then add the egg whites to the bowl. You can use a stand mixer or handheld mixer for this recipe.
- Start whipping the egg whites on medium-low speed until foamy, then add the cream of tartar.
- Increase the speed to medium-high and continue whipping until the egg whites reach soft peaks.
- Add the sugar gradually and continue mixing until the egg whites reach stiff peaks.
- Add the vanilla and cornstarch and mix until fully incorporated.
- Transfer the meringue to a piping bag fitted with a star tip and pipe 12 nests onto the prepared baking sheets. If you are using the circles as a guide, be sure to pipe the meringue inside of them. Pipe the base first and then swirl around the outside 2-3 times to make the sides of the nests.
- Bake the pavlovas for 1½ to 2 hours, or until they are crisp and dry to the touch. Meringues that are properly cooked should lift easily from the parchment so you can test them by gently lifting the edge of one of the nests. If it doesn't release easily, give it a few more minutes and check again.
- Turn off the oven and prop the door open with a wooden spoon. Allow the pavlovas to cool in the oven for 1 hour to prevent them from cracking.
- Once cooled, top the pavlovas with whipped cream and strawberry compote (or your desired topping) just before serving. Enjoy!
Whipped Cream
- Add the heavy cream, powdered sugar, and vanilla to a large bowl.
- Use a handheld mixer or stand mixer to whip the cream on medium-high speed until stiff peaks form.
- Serve immediately or store in the fridge for up to 2 hours.
Nutrition
* Nutritional information is based on third-party calculations and should be considered estimates. Actual nutritional content may vary based on brands of ingredients used, measuring methods, portion sizes, and more.
More Recipes You Might Like


Leave a Reply