


These scrumptious no-bake red velvet cake balls are certain to be a hit at your next get-together. Using simple pantry ingredients such as a cake mix and cream cheese, they make an ideal party dessert or snack. Effortless and tasty, this red velvet cake ball recipe will have everyone begging for more!

This post contains affiliate links, which means that I may make a commission on purchases and/or clicks (at no extra cost to you). Please read our full disclosure here.
If you are looking for an easy, delicious, and impressive dessert recipe to add to your collection, look no further than this irresistible no-bake red velvet cake balls recipe with cake mix!
Perfect for a romantic evening with your honey or a special occasion like birthdays and graduations. This dessert only requires five simple ingredients and are super simple to whip up.
Not enough time? Don't worry - these can also be prepped in advance and kept refrigerated until right before the big event so all you have to do is plate, serve, and enjoy. So what are you waiting for? Put on your apron and let's get cooking!
Jump to:
- What Are Cake Balls?
- Why You’ll Love This Recipe
- What You’ll Need To Make Red Velvet Cake Balls
- Step-By-Step Instructions
- Want To Make As Cake Pops Instead?
- Tips & Tricks For Making The Best Red Velvet Cake Balls
- Serving Suggestions And Substitutions
- How To Store Leftovers
- Frequently Asked Questions
- Tools And Equipment For This Recipe
- 📖 Recipe
What Are Cake Balls?
Cake balls, also known as cake pops or truffles, are small round treats that are usually made of crumbled pre-cooked cake that's been mixed with icing or frosting and then rolled into balls.
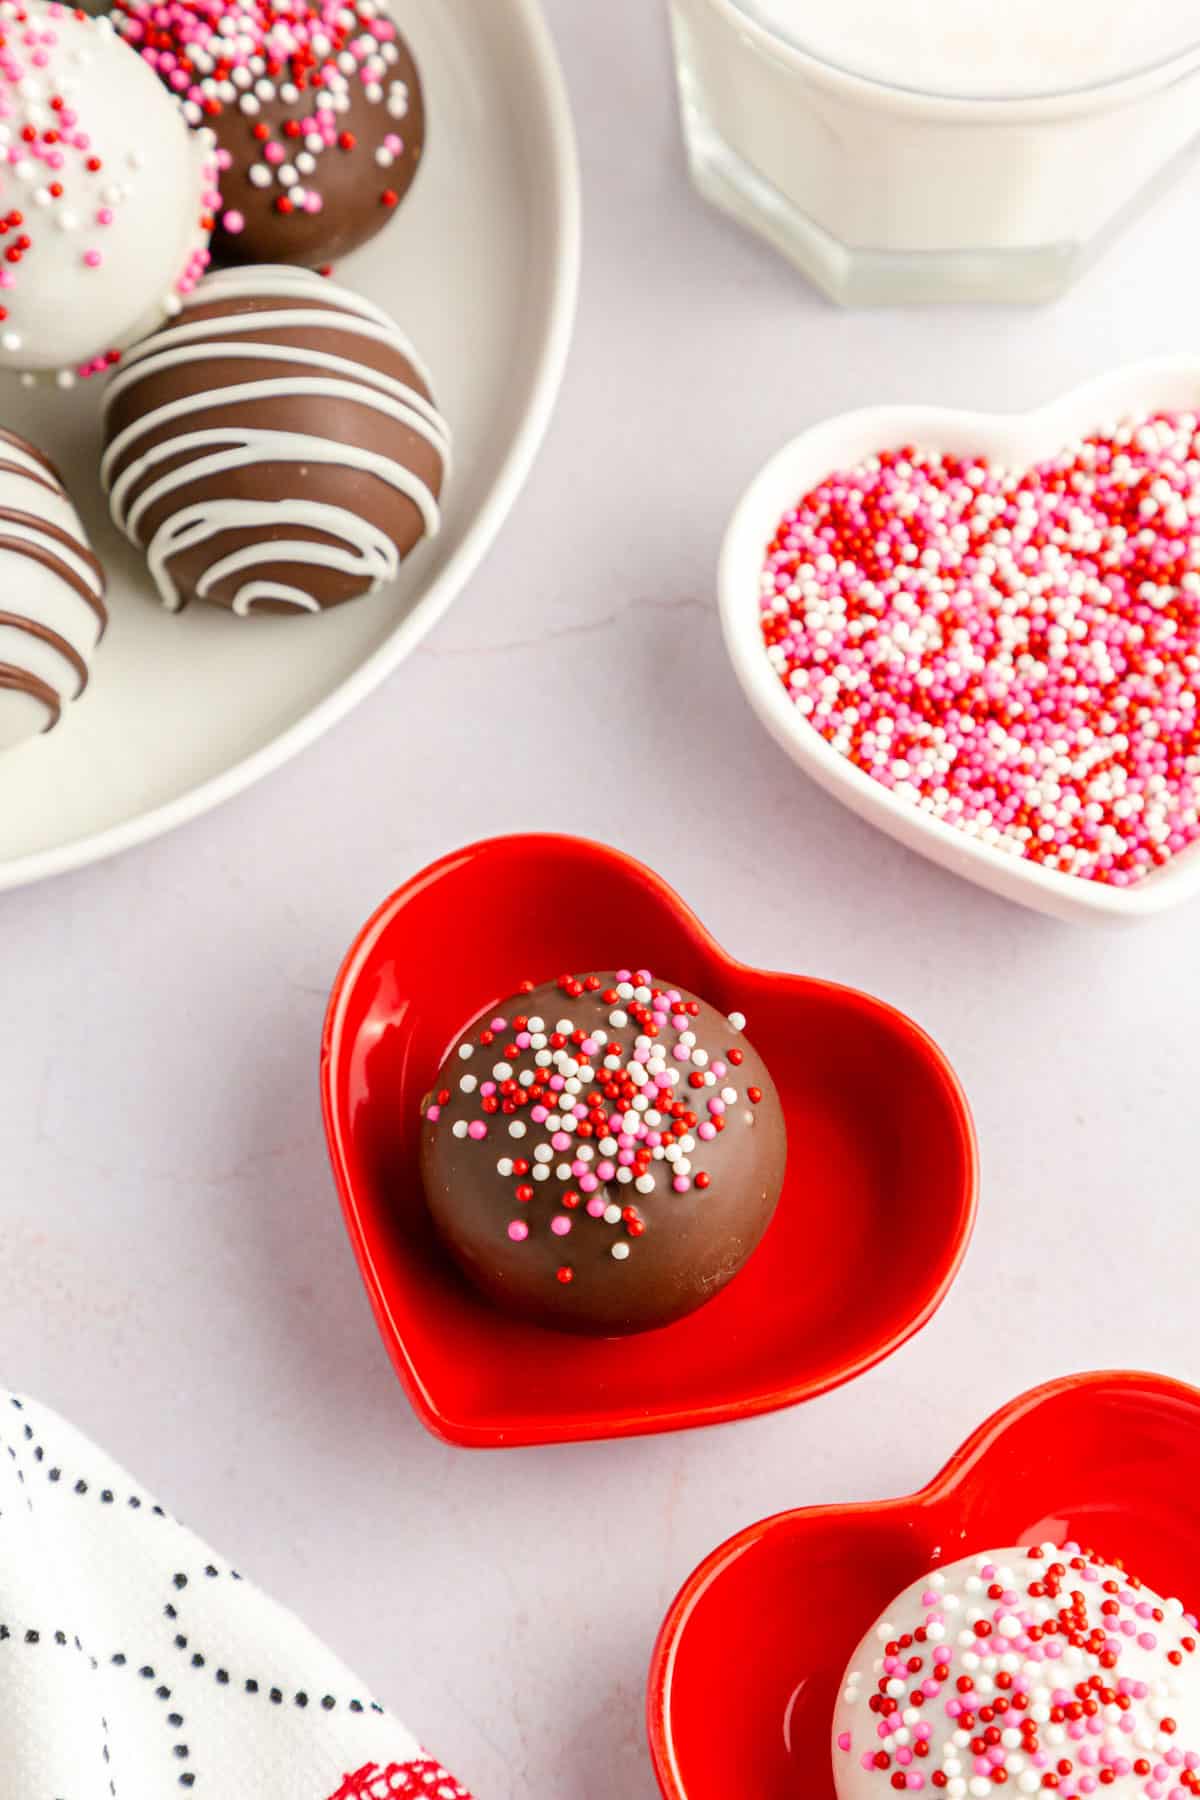
They are usually dipped in melted chocolate or other coatings and can be decorated with various toppings such as chopped nuts, sprinkles, candy pieces, etc.
This recipe is for red velvet cake balls, but you can easily turn these cake balls into red velvet cake pops if you prefer. Keep reading below for instructions to convert your cake balls into cake pops.
Why You’ll Love This Recipe
If you’re looking for an easy yet delicious dessert to satisfy your sweet tooth, look no further than the classic red velvet cake ball. This time-saving recipe requires minimal ingredients and even less time in the kitchen! Not sold? I'm sure you’ll love this recipe, and here are a few reasons why:
- These delicious cake balls are no-bake so it's easy to make them without an oven - no pre-baked cake needed!
- They're rich, creamy, and packed full of flavor - sure to be loved by kids and adults alike.
- They look great and make an impressive presentation on any dessert table.
- They're easy to customize with different sprinkles and decorations to suit your occasion or theme.
So if you’re ready to give these no-bake red velvet cake balls a try, gather your ingredients and get ready for a delectable treat that won’t disappoint!
What You’ll Need To Make Red Velvet Cake Balls

Red velvet cake mix: You'll need a box of red velvet cake mix for this recipe. I like to use Betty Crocker but any brand will work.
Cream cheese: This is a classic ingredient in many cake ball recipes, and it helps to give the balls their soft, chewy texture. I recommend using full-fat cream cheese for the best results.
Melting wafers: Melting wafers are a great alternative to traditional chocolate and will give the cake balls a beautiful, glossy finish. I like to use Ghirardelli melting wafers for this recipe as they yield consistent results and are easy to use.
Colored candy melts (optional): These come in a variety of colors, so you can choose whatever color you like. I like to use Wilton red candy melts to decorate these red velvet cake balls.
Sprinkles (optional): Finally, you can decorate the cake balls with sprinkles, if desired!
Step-By-Step Instructions
Now that we’ve gathered all of our ingredients, let’s get started!
Step 1: You will need to heat treat the cake mix before you begin to kill any bacteria. To do this, preheat the oven to 350 degrees Fahrenheit (177 degrees Celsius), line a baking sheet with parchment paper, spread the cake mix onto the parchment paper, and bake for 5-10 minutes. Set aside to cool completely.
Step 2: In a medium bowl, beat the cream cheese with a hand mixer until smooth and creamy.


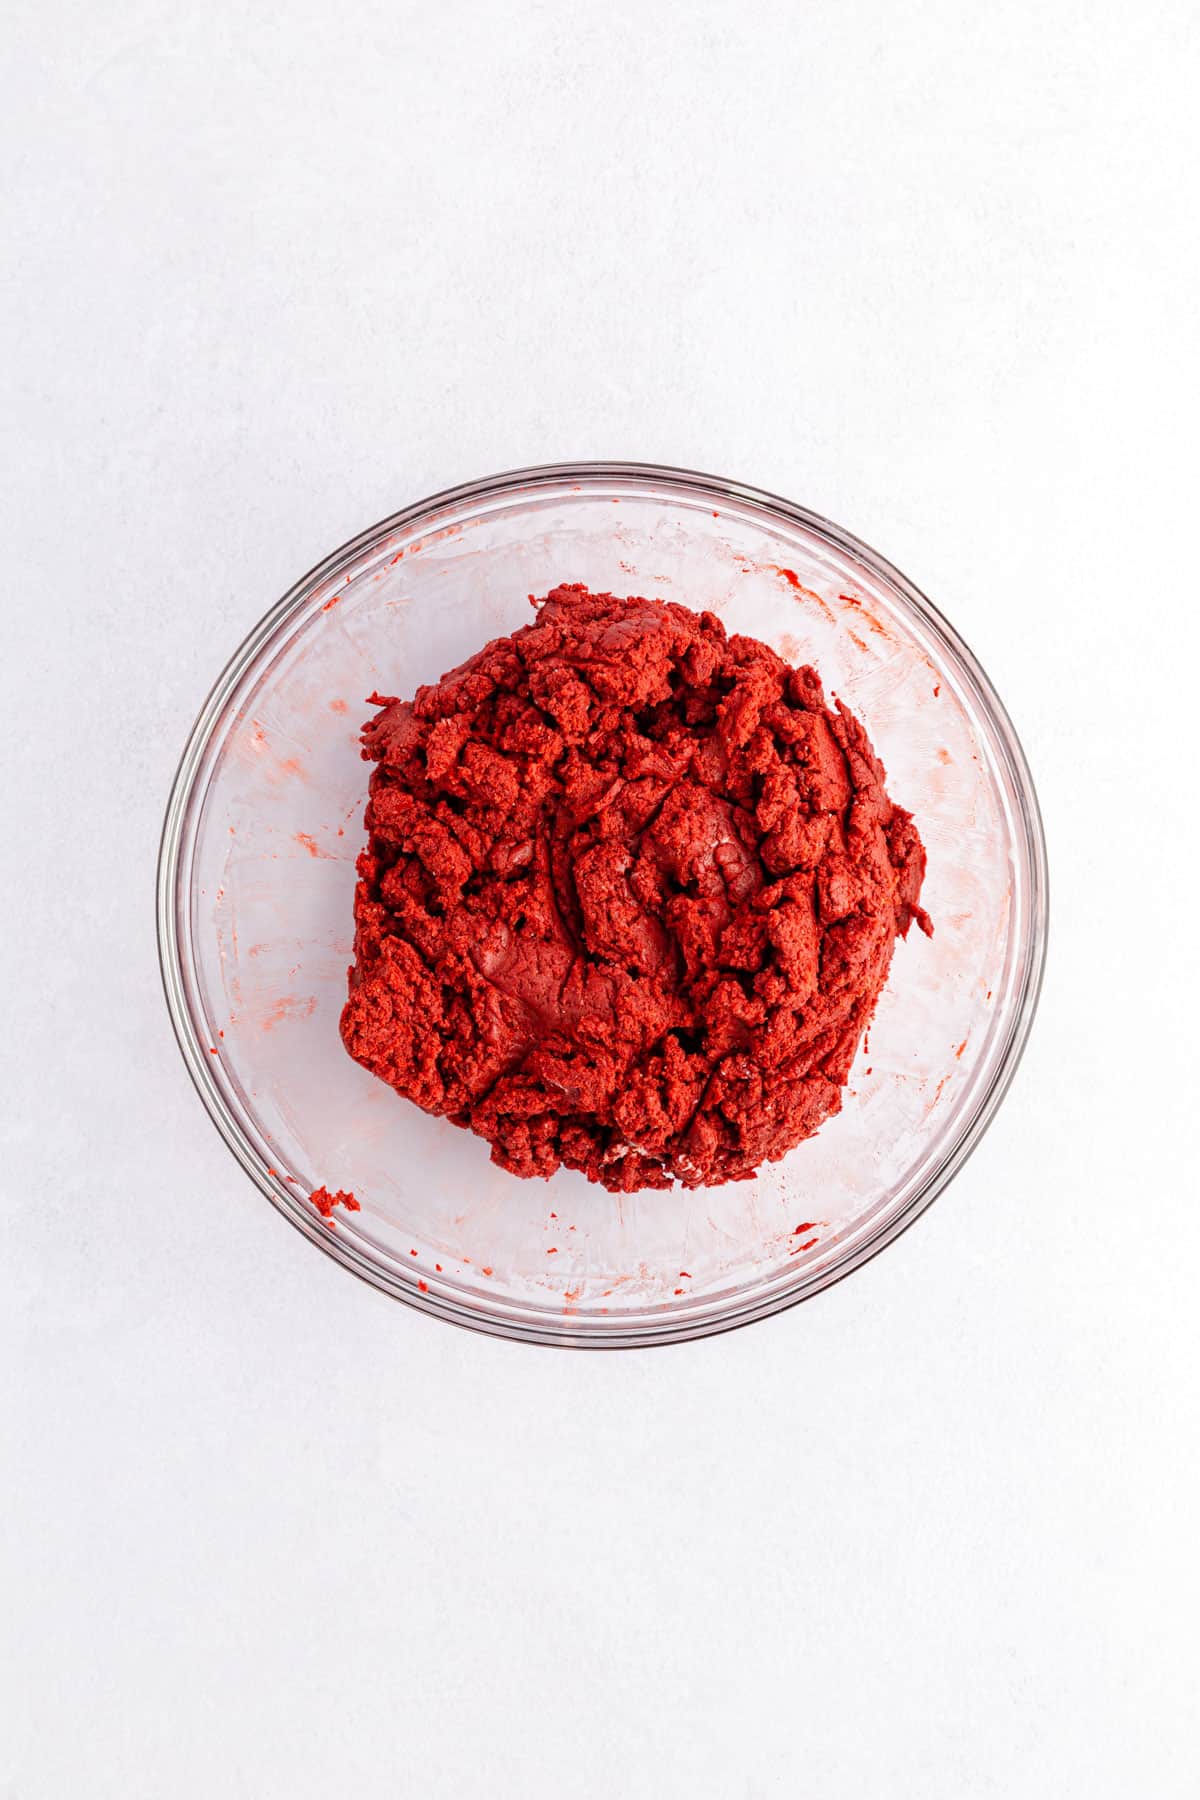
Step 3: Add the cooled cake mix to the cream cheese and mix until everything is well blended and you reach a cookie dough consistency.
Step 4: Cover the dough and refrigerate for 2 hours.
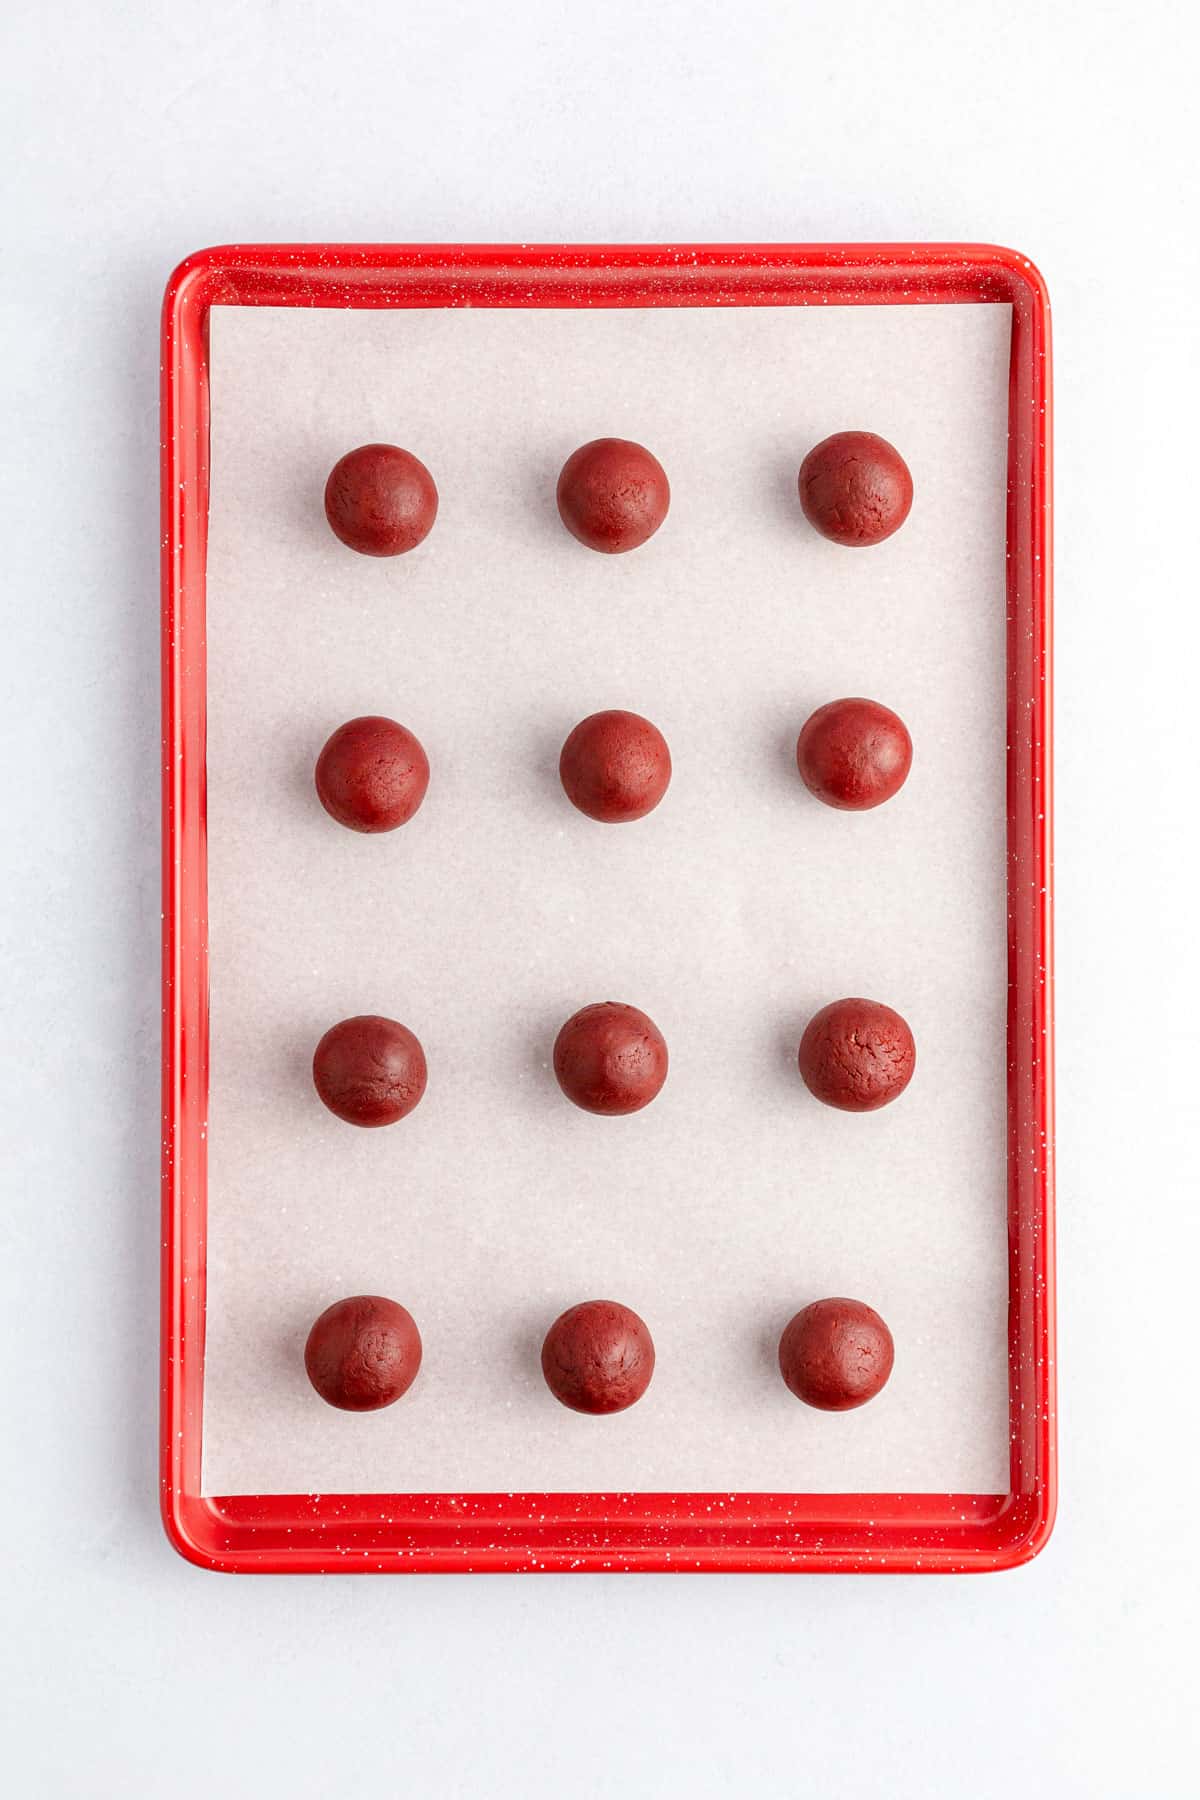
Step 5: Line two baking trays with parchment paper. Once the dough has chilled, use your hands or a 1½ tablespoon cookie scoop to form small balls and place them on the lined trays.
Step 6: Roll each scoop of dough into smooth balls using your hands and place them back onto the trays. Allow the dough balls to rest for 15 minutes at room temperature before dipping.
Step 7: Using two double boilers, melt the vanilla and chocolate wafers on the stovetop over low heat and stir occasionally until smooth. You can alternatively use two microwave-safe bowls and microwave on a low setting for 30-second increments, stirring between each time, until fully melted.
Step 8: Using a fork, dip each dough ball one at a time into the melted wafers. Remove and gently tap the fork on the edge of the bowl or pot to remove the excess coating from the ball. Place the coated ball back onto the baking sheet.
Step 9: Before the coated ball sets, sprinkle with your choice of sprinkles. Repeat with only half of the dough balls.
Step 10: Finish coating the remaining dough balls in the white and dark chocolate melts and set them 2 inches apart. These ones will not need any sprinkles.
Step 11: Pour the leftover melts from each double boiler into two separate small piping bags. Massage the bag to mix around the contents and make sure there are no lumps.
Step 12: Snip off a small piece of the tip and then drizzle onto the leftover balls.


Step 13: Allow to set completely before serving. Enjoy!
Want To Make As Cake Pops Instead?
If you want to take your cake balls one step further, you can turn them into cute little red velvet cake pops! All you need is some lollipop sticks, melted wafers, and sprinkles and the instructions are almost exactly the same as above.
Instead of using a fork to dip your cake balls, simply dip the end of a lollypop stick in the melted wafers and insert it into the side of the cake ball. Once the stick is firmly in place, dip the entire cake pop into the melted wafers and then set on a parchment paper-lined baking sheet.
Decorate the cake pops with sprinkles, if desired, and allow to set completely before serving.

Tips & Tricks For Making The Best Red Velvet Cake Balls
Cake balls are fun and easy to make, but there are a few key tips and tricks that will make sure your cake balls turn out perfectly every time. Here are some of my top tips for making the best red velvet cake balls:
- Be sure to heat treat the cake mix before preparing your cake ball dough. This will ensure that any potential bacteria present in the mix is killed and the balls are safe to eat raw.
- Chill the dough before rolling it into balls. This will make it easier to work with and produce a more consistent texture for your cake balls.
- Make sure you allow the cake balls to rest for 15-20 minutes after rolling them. This will allow them to expand and come closer to room temperature before you dip them in the coating. If you coat the balls while they are too cold and the melts are too hot it is more likely that your coating will crack.
- If you don't want to heat treat the cake mix in the oven, you can do this in the microwave. Use a microwave-safe bowl and heat the cake mix for three minutes, stirring every 30 seconds to prevent hot spots.
- I prefer to use high-quality melting wafers like Ghirardelli vanilla or dark chocolate to coat the balls and Wilton candy melts just for decorating. I find that the Wilton candy melts tend to clump faster than the Ghirardelli wafers so you'll get a smoother coating with the Ghirardelli wafers.

Serving Suggestions And Substitutions
These red velvet cake balls are delicious on their own, but they can also be served with a variety of side dishes and toppings. Try serving them with a dollop of whipped cream, ice cream, or even some fresh fruit. They're perfect for potlucks, parties, or just a fun treat!
When it comes to substitutions, there are a few easy ones you can make. You can use any type of coating you like, from white chocolate to dark chocolate. If you don't have melting wafers, you can also use regular chocolate chips.
You can also change up the sprinkles to match any theme or occasion you have in mind.
Lastly, if you don't want to use red velvet cake mix you can substitute your favorite flavor. White cake mix would work great, as well as yellow or even chocolate! Another great substitution if you don't have cake mix on hand is Oreo cookies, as used in this Oreo Balls recipe.
How To Store Leftovers
Once the cake balls have cooled completely, you can store them in an airtight container in the refrigerator for up to one week. You can also freeze them for up to three months. Make sure to wrap them tightly in plastic wrap before freezing.
When you're ready to enjoy a frozen cake ball, simply thaw at room temperature for an hour or so before serving.
No matter how you choose to enjoy them, these red velvet cake balls are sure to be a hit! With their delicious flavor and festive decorations, these cake balls are the perfect treat for any occasion.
Frequently Asked Questions
Yes, you can easily turn these into cake pops by inserting a lollipop stick into each ball before dipping them in the coating.
Yes, it is important to heat treat the cake mix before making the dough. This will kill any bacteria that may be present in the cake mix and make it safe to eat raw. You can do this in the oven or microwave, depending on your preference.
Yes, you can use any flavor of boxed cake mix that you prefer. Just make sure to follow the heat-treating instructions before using cake mix in any recipe that won't be cooked.
Yes, you can use any type of melting wafers or chocolate chips to coat the balls. White chocolate, dark chocolate, or even colored candy melts would work great!

Tools And Equipment For This Recipe
Glass Mixing Bowls: These glass mixing bowls are super versatile. You can use them for mixing, storing, and serving.
KitchenAid Hand Mixer: This hand mixer is my go-to for mixing everything from cake mix to cheese balls. It's powerful, easy to use, and easy to clean.
Baking Tray: This non-stick baking tray is perfect for laying out your dipped cake balls to set. It's also great for making cookies or other baked goods.
📖 Recipe

Red Velvet Cake Balls With Cream Cheese
Ingredients
- 15.25 ounce box red velvet cake mix
- 8 ounces cream cheese softened
- 10 ounces Ghirardelli white vanilla melting wafers
- 10 ounces Ghirardelli dark chocolate melting wafers
- sprinkles or colored candy melts to decorate
Instructions
- You will need to heat treat the cake mix before you begin to kill any bacteria. To do this, preheat the oven to 350 degrees Fahrenheit (177 degrees Celsius), line a baking sheet with parchment paper, spread the cake mix onto the parchment paper, and bake for 5-10 minutes. Set aside to cool completely.
- In a medium bowl, beat the cream cheese with a hand mixer until smooth and creamy.
- Add the cooled cake mix to the cream cheese and mix until everything is well blended and you reach a cookie dough consistency.
- Cover the dough and refrigerate for 2 hours.
- Line two baking trays with parchment paper. Once the dough has chilled, use your hands or a 1½ tablespoon cookie scoop to form small balls and place them on the lined trays.
- Roll each scoop of dough into smooth balls using your hands and place them back onto the trays. Allow the dough balls to rest for 15 minutes at room temperature before dipping.
- Using two double boilers, melt the vanilla and chocolate wafers on the stovetop over low heat and stir occasionally until smooth. You can alternatively use two microwave-safe bowls and microwave on a low setting for 30-second increments, stirring between each time, until fully melted.
- Using a fork, dip each dough ball one at a time into the melted wafers. Remove and gently tap the fork on the edge of the bowl or pot to remove the excess coating from the ball. Place the coated ball back onto the baking sheet.
- Before the coated ball sets, sprinkle with your choice of sprinkles. Repeat with only half of the dough balls.
- Finish coating the remaining dough balls in the white and dark chocolate melts and set them 2 inches apart. These ones will not need any sprinkles.
- Pour the leftover melts from each double boiler into two separate small piping bags. Massage the bag to mix around the contents and make sure there are no lumps.
- Snip off a small piece of the tip and then drizzle onto the leftover balls.
- Allow to set completely before serving. Enjoy!
Nutrition
* Nutritional information is based on third-party calculations and should be considered estimates. Actual nutritional content may vary based on brands of ingredients used, measuring methods, portion sizes, and more.


Ava says
Oh wow. These are so good.